How to Cook Venison Backstrap — The Best Cast Iron Method for Tender, Juicy Results

This post contains affiliate links. If you purchase through these links, I may earn a small commission at no extra cost to you.
Introduction
Did you know venison has 50% less fat than beef and more protein per serving? It’s one of the leanest, cleanest proteins you can put on the table — and the backstrap is the crown jewel of the whole deer.
I’ll be honest. The first time I cooked a backstrap I completely ruined it. I threw it in a pan that wasn’t hot enough, cooked it to well-done because I was nervous about “wild meat,” and served something that tasted like a leather boot. My hunting buddy never let me forget it.
Fast forward to today, and venison backstrap is the one meal I’ll put in front of anyone — skeptics included. The trick isn’t complicated. But there are a handful of things you absolutely have to get right, and I’m going to walk you through every single one of them.
Whether you’ve been hunting for decades or this is your first deer, this guide will show you exactly how to cook venison backstrap so it comes out tender, juicy, and clean-tasting every single time.
Table of Contents
What Is the Venison Backstrap and Why Does It Matter?
Okay, so let’s start at the beginning because I know not everyone reading this is a seasoned hunter.
The backstrap is the long muscle that runs along both sides of a deer’s spine, from the shoulders all the way down to the hindquarters. Think of it as the deer’s version of a beef tenderloin — it’s a muscle that barely gets used, which is exactly why it’s so incredibly tender.
On a mature whitetail, you’ll get two backstraps, each running maybe two feet long and a couple inches thick. It’s not the largest cut on the animal, but it’s hands-down the most prized. A lot of hunters won’t share it with anyone. I get it.
Here’s what makes the backstrap special from a cooking standpoint. It’s extremely lean — almost no intramuscular fat compared to beef. That’s great for nutrition, but it means it cooks fast and punishes you hard if you overcook it. Beef has enough marbling to forgive a little extra time in the pan. Venison does not. You’ve got maybe a 5-degree window between perfect and disappointing.
The good news? Once you understand that, the rest is straightforward. Get your pan hot, know your target temperature, and don’t walk away from the stove.
How to Prep Venison Backstrap Before Cooking
This is the section most recipe blogs skip over, and it’s honestly where the meal is won or lost before you ever turn on the stove.
Remove the silver skin first. This is non-negotiable. The silver skin is that thin, shiny membrane running along the outside of the backstrap. It doesn’t break down when cooked, and it’ll cause the meat to curl, toughen, and basically ruin your sear. Slip a sharp knife under it at one end, angle the blade slightly upward, and work it off in long strokes. It takes about five minutes and makes a night-and-day difference.
Dry brine it — at least one hour, overnight if you can. Season the backstrap generously on all sides with kosher salt and fresh cracked black pepper. Set it on a wire rack, uncovered, in the fridge. The salt draws moisture to the surface, then pulls it back in, seasoning the meat all the way through. It also dries the surface so you get an actual crust when it hits the pan — not steaming.
I used to skip the dry brine because I was impatient. Every single time I did, the sear was weaker and the seasoning was surface-level. Now I won’t cook a backstrap without at least an hour in the fridge.
Bring it to room temperature before cooking. Pull it from the fridge 30–45 minutes before you’re ready to cook. Cold meat hitting a screaming hot pan cooks unevenly — the outside is overdone before the center reaches temperature. This one’s easy and costs you nothing but a little patience.
Pat it completely dry. Right before it goes in the pan, pat the surface dry with paper towels. Any moisture left on the surface will steam instead of sear. You want contact between dry meat and a hot oiled surface. That’s what makes the crust.
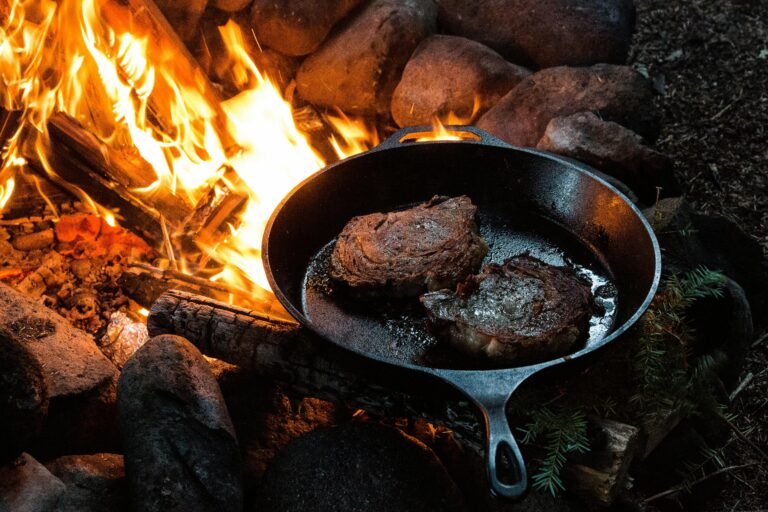
The Best Way to Cook Venison Backstrap — Cast Iron Skillet Method
There are a lot of ways to cook venison backstrap — grill, reverse sear, sous vide. They all work. But cast iron on the stovetop is my go-to every time. Here’s why: control. Cast iron holds heat evenly, gives you an incredible crust, and lets you baste with butter and herbs right in the pan. It’s hard to beat. Head over and check out our cast iron recommendation in our Father’s Day Gift Guide.
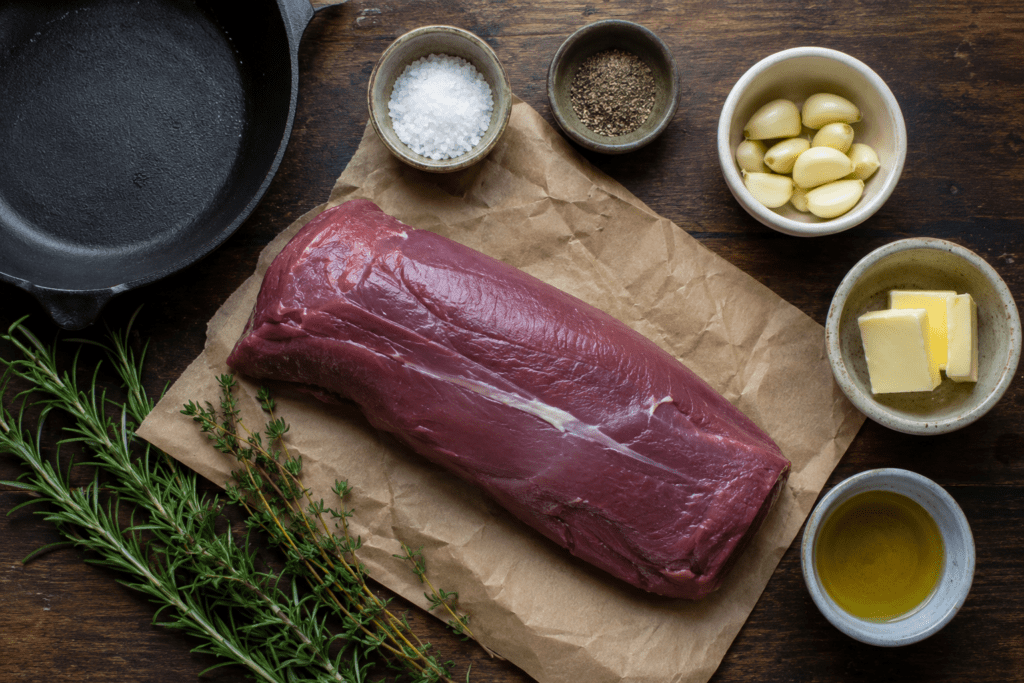
What you’ll need:
- 12-inch cast iron skillet
- 2 tablespoons olive oil
- 2 tablespoons butter
- 4 cloves garlic, smashed
- 3–4 sprigs fresh rosemary or thyme
- Kosher salt and fresh cracked pepper
- Instant-read thermometer
Step 1 — Get the pan screaming hot. Place your cast iron over medium-high heat for 3–4 full minutes. You should see a faint wisp of smoke. Add the olive oil. If it shimmers immediately and moves like water, you’re ready. If it just sits there, wait another minute.
A lot of people rush this step. Don’t. A lukewarm pan will steam your backstrap instead of searing it, and you’ll lose that gorgeous brown crust that carries so much of the flavor.
Step 2 — Sear on all sides. Lay the backstrap in the pan away from you — always away from you with a hot pan. You should hear an aggressive sizzle. If it’s quiet, pull it out and wait for the pan to get hotter.
Sear each side for about 2–3 minutes without touching it. Let the crust form. Flip to the next side and repeat until all sides have that deep brown color. For a 1.5-inch thick backstrap, figure about 8–10 minutes total.
Step 3 — Butter baste. Once you’ve got a crust on all sides, add the butter, smashed garlic, and herbs to the pan. Tilt the skillet and use a spoon to scoop that foaming, herb-infused butter over the meat continuously for about 60–90 seconds. This is the move. The butter carries all that garlic and rosemary flavor right into the meat as it finishes cooking.
I learned this technique watching a chef cook a beef tenderloin years ago, and the day I started doing it with venison was a game changer. It adds so much flavor in under two minutes.
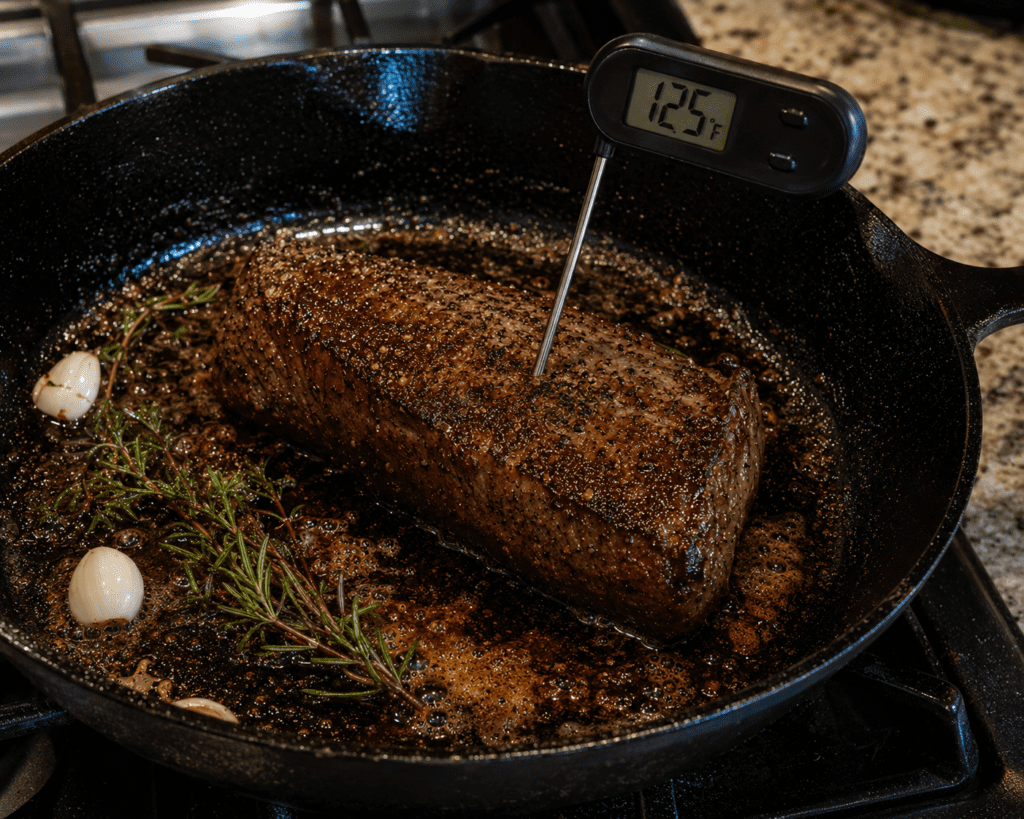
Step 4 — Check your temperature. Start checking the internal temp during the butter baste. You want to pull the backstrap 5 degrees before your target temperature — it continues cooking while it rests.
Venison Backstrap Internal Temperature Guide
This is the most important section in the entire post. Seriously. Write these temps down.
Venison is lean. Unlike beef, it has almost no fat to keep it moist if it’s overcooked. Once you cross that well-done threshold, the texture turns tough and the flavor gets strong in a way that’s hard to rescue.
| Doneness | Pull from heat | Final resting temp |
|---|---|---|
| Rare | 115°F | 120°F |
| Medium-rare (recommended) | 125°F | 130°F |
| Medium | 135°F | 140°F |
| Medium-well | 145°F | 150°F |
| Well done | 150°F+ | Not recommended |
Medium-rare is the sweet spot. At 130°F the meat is rosy pink, incredibly tender, and has a clean, slightly sweet flavor with zero gamey taste. This is the temp that converts non-hunters.
Don’t guess. Use a thermometer. A good instant-read thermometer costs $15 and takes all the stress out of this. I use an Alpha Grillers Meat Thermometer and it’s been worth every penny.
How to Rest and Slice Venison Backstrap
Rest it for 10 minutes — no shortcuts. This is the step people skip because they’re hungry and the kitchen smells incredible. I get it. Skip it anyway and you’re leaving all the best stuff on the cutting board.
When meat cooks, the muscle fibers tighten and squeeze moisture toward the center. Resting lets those fibers relax and reabsorb the juices throughout the whole cut. Cut it too soon and you’ll see a flood of liquid pool on your board. That’s the juice that should have stayed in your meat.
Set the backstrap on a cutting board and tent it loosely with foil. Ten minutes. Use the time to make a quick pan sauce.
Quick pan sauce while you wait: Don’t waste what’s in that cast iron. Add a minced shallot to the pan, cook it 60 seconds, then deglaze with a quarter cup of beef broth or red wine. Scrape up all those browned bits — that’s pure flavor. Let it reduce by half, then swirl in a tablespoon of cold butter. Done. That sauce over sliced backstrap is something else.
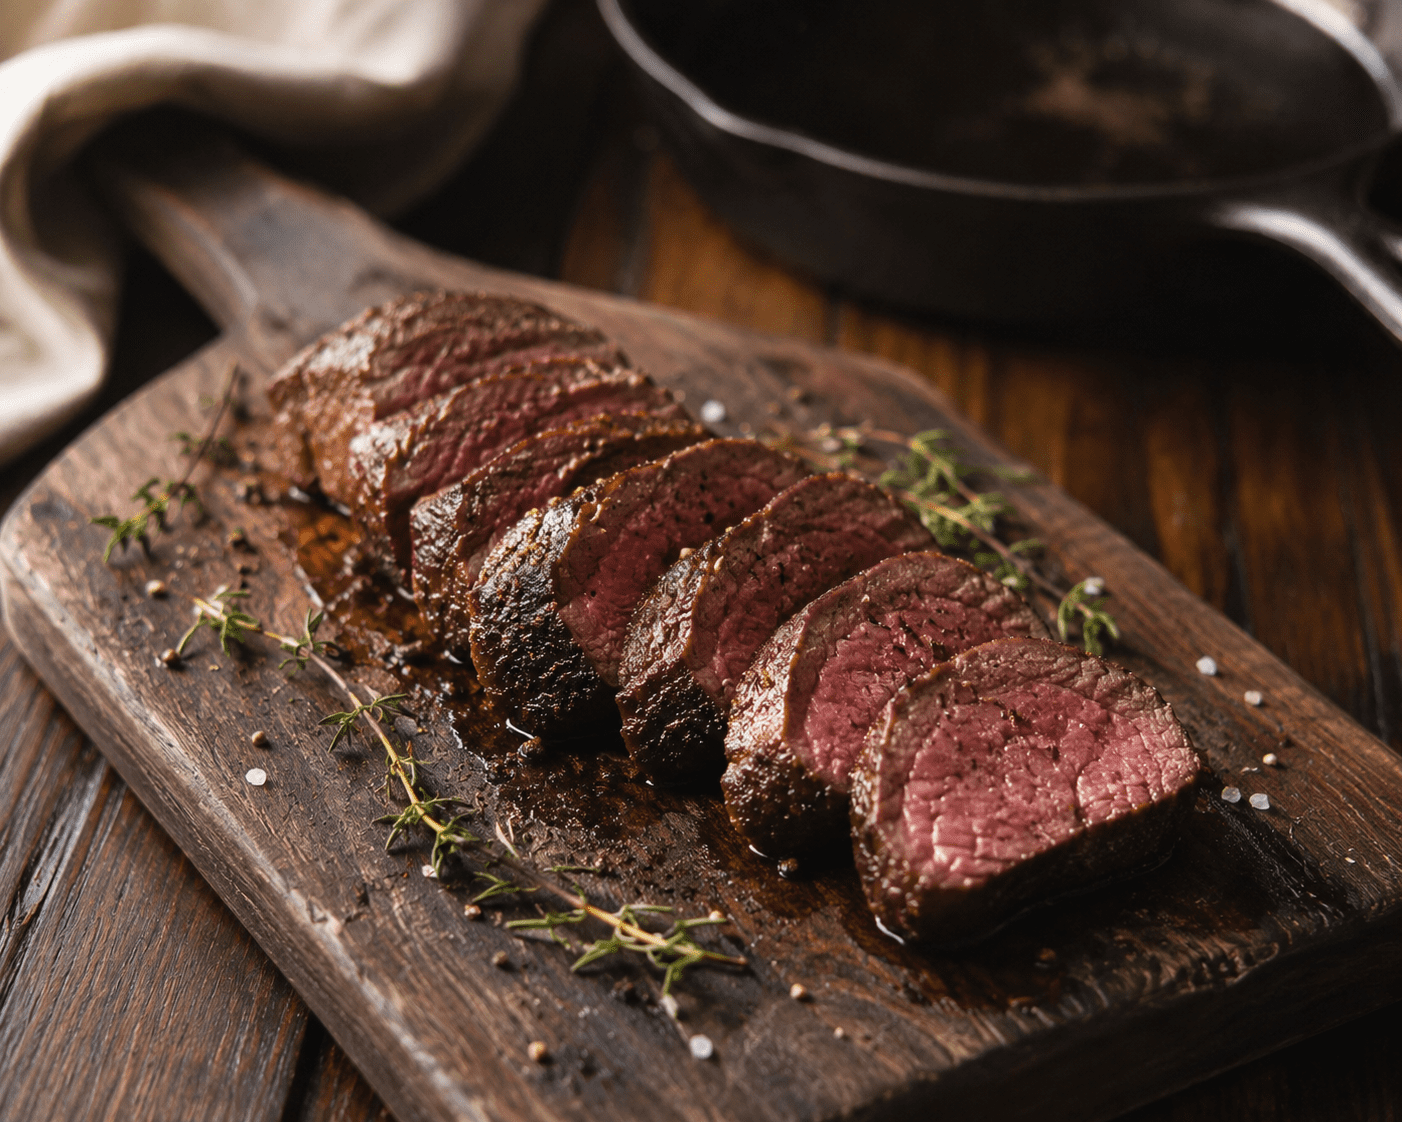
Slice against the grain. Look at the direction the muscle fibers run — they’ll be visible on the cut end. Slice perpendicular to them. Cutting with the grain gives you long, chewy strands. Against the grain gives you short, tender bites that practically dissolve.
Cut into half-inch medallions at a slight angle. The inside should be rosy pink with a deep brown crust. If you hit that, you nailed it.
What to Serve with Venison Backstrap
Venison backstrap is rich enough to hold its own with bold sides but clean enough that simple preparation really lets it shine. Here’s what I reach for most often:
Hearty sides that complement the richness:
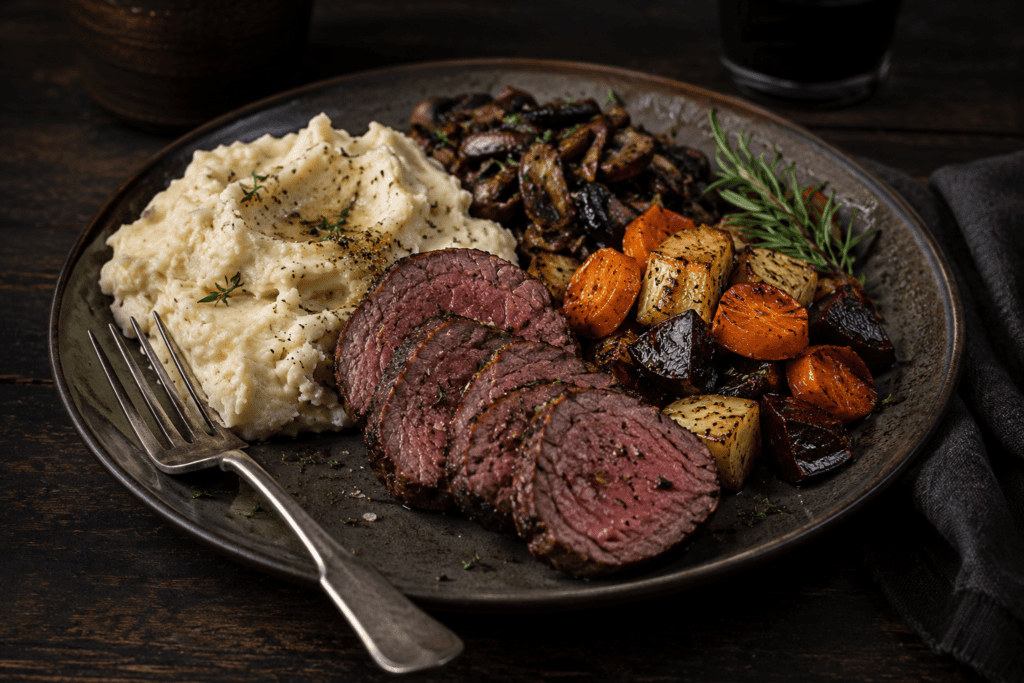
- Roasted garlic mashed potatoes — the classic pairing, absorbs the pan sauce beautifully
- Sautéed wild mushrooms in butter and thyme — earthy, umami-forward, a natural match
- Roasted root vegetables with rosemary — parsnips, carrots, and sweet potato work great
- Creamy polenta — if you want something a little different that still feels rustic and right
Lighter sides that balance the richness:
- Arugula salad with lemon, shaved parmesan, and a light vinaigrette
- Roasted asparagus with garlic and olive oil
- Simple green beans with almonds and butter
For a full field-to-table dinner try this combination: garlic mashed potatoes, roasted wild mushrooms, and a simple arugula salad. Add the pan sauce from above and some crusty bread for soaking it up. That meal has turned more than a few “I don’t eat venison” people into believers.
Common Mistakes When Cooking Venison Backstrap
I’ve made every one of these. Learn from my pain.
Overcooking it. Said it before, saying it again. This is mistake number one by a wide margin. Venison at well-done is a completely different eating experience than venison at medium-rare. Not in a good way. Pull it at 125°F. Trust the thermometer.
Not removing the silver skin. Five minutes of prep that completely changes the texture. The silver skin doesn’t break down — it tightens when heated, causes the meat to curl, and stays chewy no matter how long you cook it. Always remove it.
Cooking it cold from the fridge. Cold center, overcooked exterior. Room temperature first, every time.
Not patting it dry. Any surface moisture means steaming instead of searing. Pat it completely dry right before it goes in the pan.
Using a pan that isn’t hot enough. A lukewarm pan produces a gray, steamed exterior with no crust. Heat your cast iron for 3–4 full minutes before adding oil. You want a pan that’s genuinely hot — not warm, not medium, hot.
Cutting it too soon. I know it’s hard to wait. Wait anyway. Ten minutes of resting makes a real, noticeable difference in how juicy the final slices are.
Marinating too long in acid. If you use an acidic marinade — citrus, vinegar, wine — don’t go more than 4 hours. The acid breaks down the proteins and turns the texture mushy. A simple salt-and-pepper dry brine is honestly all you need.
Frequently Asked Questions
Does venison backstrap taste gamey? When prepared and cooked correctly, not at all. Gamey flavor most often comes from improper field dressing, leaving the silver skin on, or overcooking. A properly handled backstrap cooked to medium-rare tastes clean, slightly sweet, and more flavorful than beef — not gamey. The people who say venison is too gamey have almost always had venison that was overcooked or poorly handled in the field.
Can I cook venison backstrap from frozen? Technically yes, but thaw it first if at all possible. Frozen-to-pan cooking makes even temperature almost impossible and you’re much more likely to overcook the exterior before the center reaches temp. Thaw overnight in the fridge and you’ll have much better results.
What’s the best marinade for venison backstrap? Honestly, the backstrap doesn’t need much. A dry brine of kosher salt, pepper, and maybe a little garlic powder does the job. If you want a marinade, try olive oil, minced garlic, fresh rosemary, and a splash of Worcestershire. Keep it under 4 hours and skip anything heavily acidic.
Can I cook venison backstrap in the oven? Yes. The best method is to sear it first in cast iron to build the crust, then transfer the pan to a 400°F oven and finish until you hit your target internal temperature. This works especially well for a thicker cut where you want more even heat penetration.
How do I store leftover venison backstrap? Wrap tightly and refrigerate for up to 3 days. To reheat, use a skillet over low heat with a splash of beef broth — the gentle heat and added moisture keeps it from drying out. Avoid the microwave if you can; it tends to overcook it unevenly.
How long does venison backstrap take to cook? For a 1 to 1.5-inch thick backstrap in a cast iron skillet, figure 8–12 minutes total including butter basting. Always go by internal temperature rather than time — every piece of meat is different.
Conclusion
Cooking venison backstrap well is one of those skills that sounds harder than it actually is. Remove the silver skin. Dry brine it. Get your cast iron screaming hot. Pull it at 125°F. Rest it for ten minutes. That’s really the whole thing.
The details matter, but none of them are complicated. And once you nail it the first time — once you slice into that rosy pink medallion with the deep brown crust and watch the pan sauce hit the plate — you’ll understand why hunters protect this cut like it’s gold.
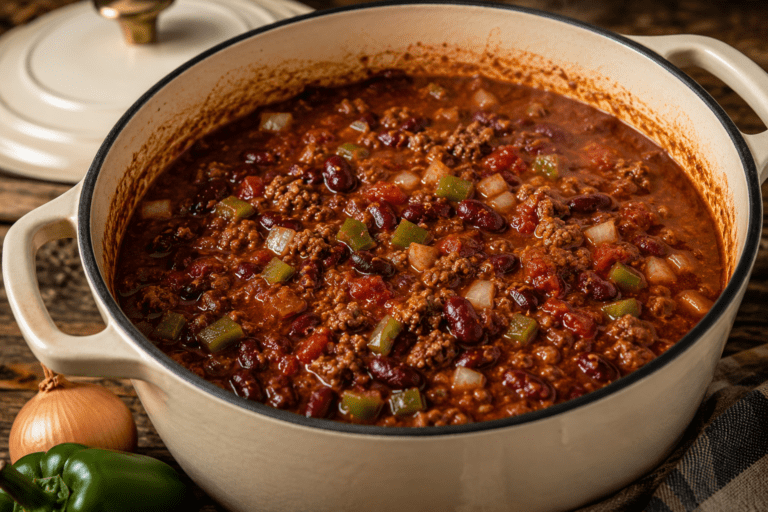
Field to table cooking doesn’t get better than this. Now go cook that backstrap you’ve been saving in the freezer. And when your non-hunter friends ask for seconds, you’ll know you did it right. For another mouth-watering venison recipe to try, check out our Venison Chili Recipe post.
Got a go-to backstrap seasoning or side dish you swear by? Drop it in the comments — I’m always looking for new ways to serve this cut.